自定义 NavigationView 时StatusBarColor的小问题
2016年04月10日 星期日, 发表于 上海
如果你对本文有任何的建议或者疑问, 可以在 这里给我提 Issues, 谢谢! :)
一般我们使用 Navigation Menu 的形式为
1
2
3
4
5
6
7
8
9
10
11
12
13
14
15
16
17
18
19
20
21
22
23
24
25
26
<?xml version="1.0" encoding="utf-8"?>
<android.support.v4.widget.DrawerLayout
    android:id="@+id/drawer_layout"
    xmlns:android="http://schemas.android.com/apk/res/android"
    xmlns:app="http://schemas.android.com/apk/res-auto"
    xmlns:tools="http://schemas.android.com/tools"
    android:layout_width="match_parent"
    android:layout_height="match_parent"
    android:fitsSystemWindows="true"
    tools:openDrawer="start">

    <include
        layout="@layout/app_bar_main"
        android:layout_width="match_parent"
        android:layout_height="match_parent"/>

    <android.support.design.widget.NavigationView
        android:id="@+id/nav_view"
        android:layout_width="wrap_content"
        android:layout_height="match_parent"
        android:layout_gravity="start"
        android:fitsSystemWindows="true"
        app:headerLayout="@layout/nav_header_main"
        app:menu="@menu/activity_main_drawer"/>

</android.support.v4.widget.DrawerLayout>
再加上 v21 的主题:
1
2
3
4
5
6
<style name="AppTheme.NoActionBar">
    <item name="windowActionBar">false</item>
    <item name="windowNoTitle">true</item>
    <item name="android:windowDrawsSystemBarBackgrounds">true</item>
    <item name="android:statusBarColor">@android:color/transparent</item>
</style>
这种最标准的形式, 运行的效果就是这样的:
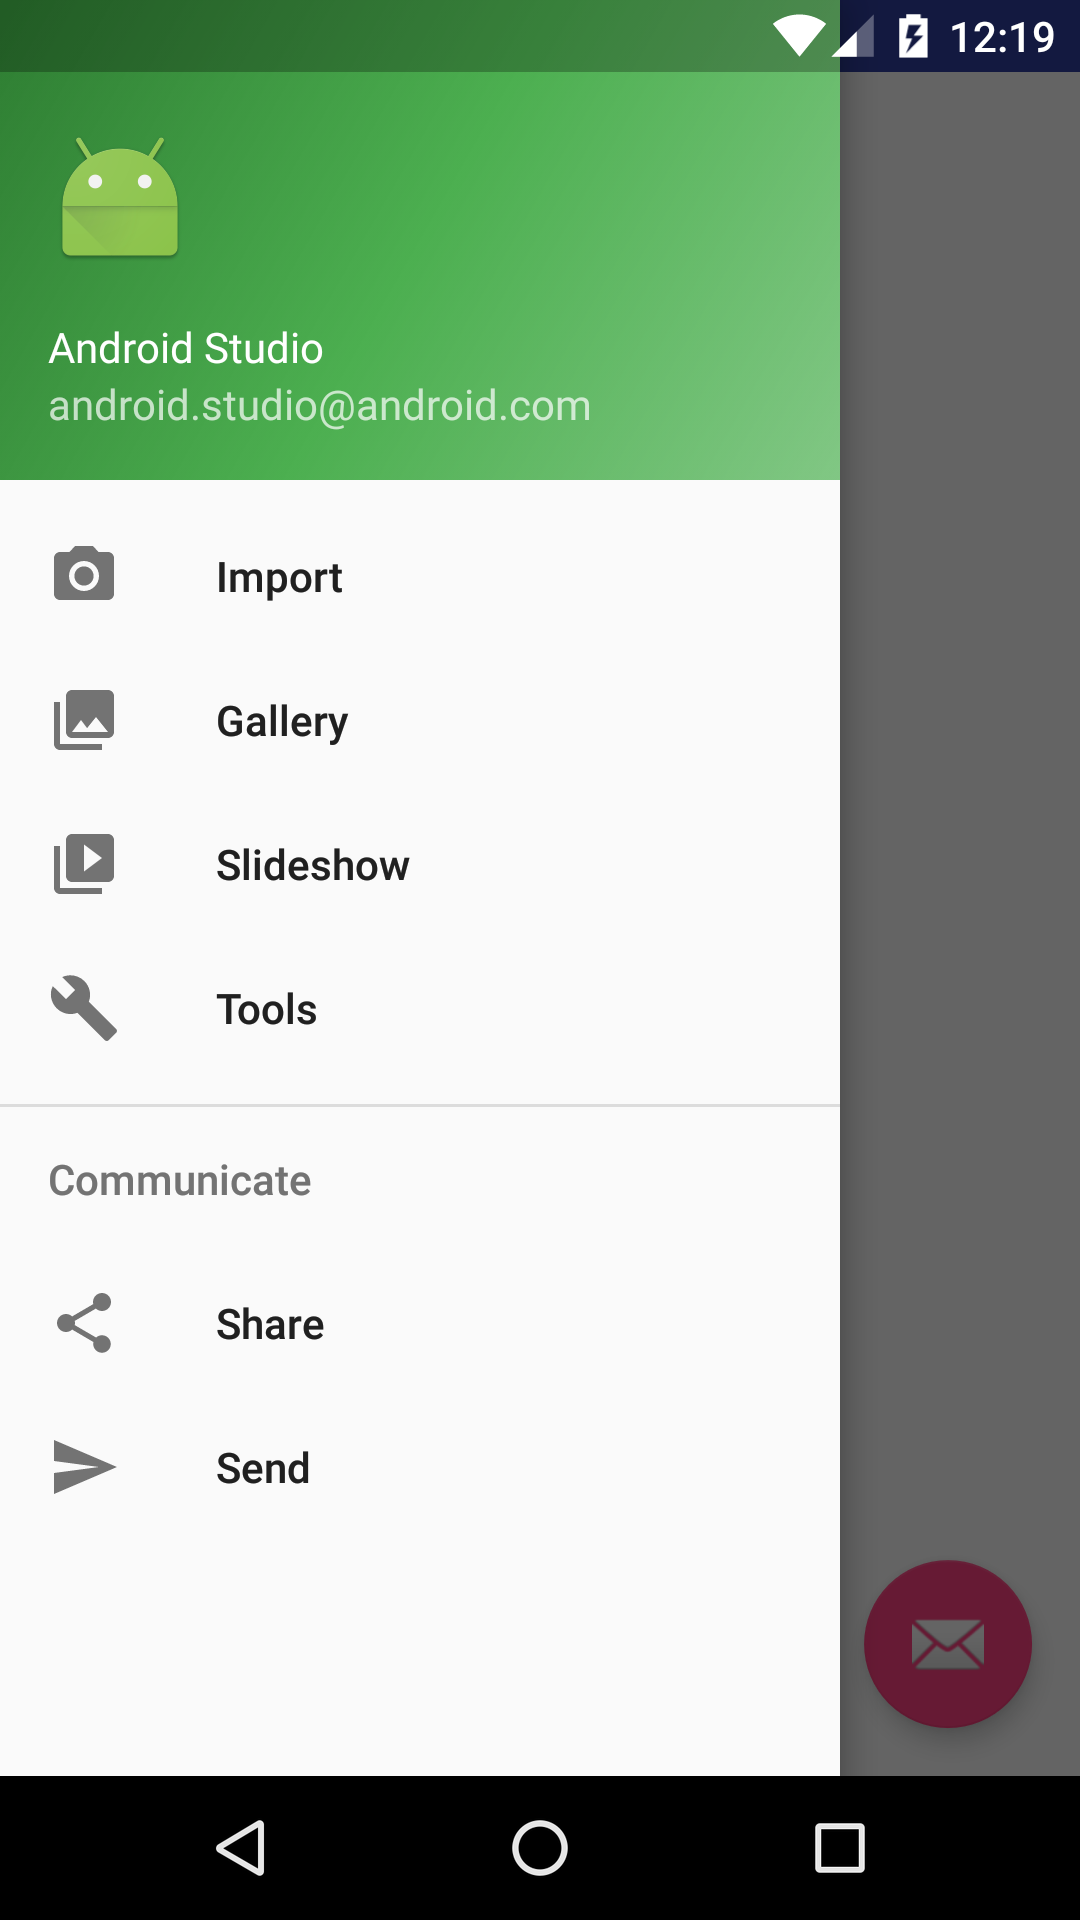
这种效果看起来就好像状态栏浮在 NavigationLayout 之上, 感觉上会好很多
不过, 很多时候, 我们想定义自己的 NavigationMenu, 但是当你换上你自己的 View 替换掉 1
NavigationView
1
2
3
4
5
6
7
8
9
10
11
12
13
14
15
16
17
18
19
20
21
22
23
24
<?xml version="1.0" encoding="utf-8"?>
<android.support.v4.widget.DrawerLayout
android:id="@+id/drawer_layout"
xmlns:android="http://schemas.android.com/apk/res/android"
xmlns:tools="http://schemas.android.com/tools"
android:layout_width="match_parent"
android:layout_height="match_parent"
android:fitsSystemWindows="true"
tools:openDrawer="start">
<include
layout="@layout/app_bar_main"
android:layout_width="match_parent"
android:layout_height="match_parent"/>
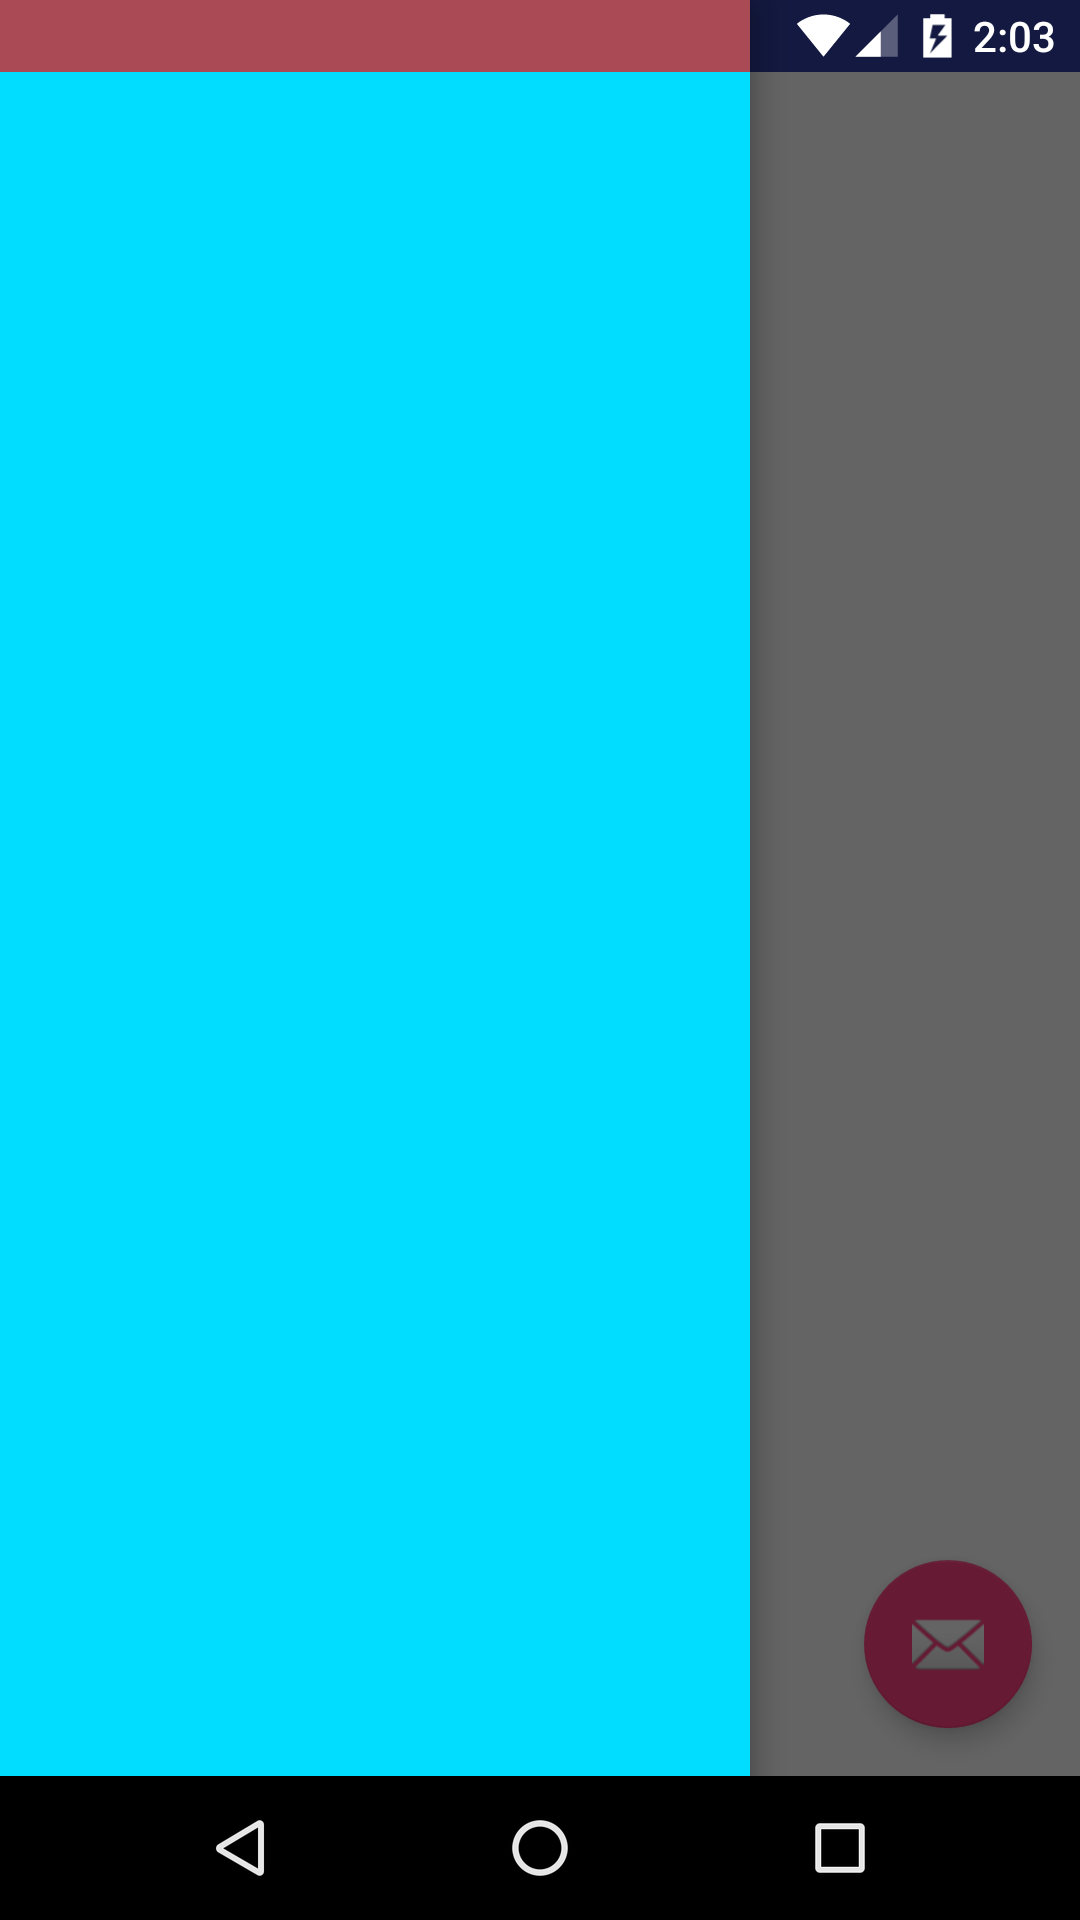
<FrameLayout
android:layout_gravity="start"
android:layout_width="250dp"
android:layout_height="match_parent"
android:fitsSystemWindows="true"
android:background="@android:color/holo_blue_bright">
</FrameLayout>
</android.support.v4.widget.DrawerLayout>
运行效果是这样的:

我们查看 1
NavigationView
1
ScrimInsetsFrameLayout
1
ScrimInsetsFrameLayout
1
ScrimInsetsFrameLayout
1
2
3
4
5
6
7
8
9
10
11
12
13
14
15
16
17
18
19
20
21
22
23
24
25
26
27
28
29
30
31
32
33
34
35
36
37
38
39
40
41
42
43
44
45
46
47
48
49
50
51
52
53
54
55
56
57
58
59
60
61
62
63
64
65
66
67
68
69
70
71
72
public ScrimInsetsFrameLayout(Context context, AttributeSet attrs, int defStyleAttr) {
    super(context, attrs, defStyleAttr);

    final TypedArray a = context.obtainStyledAttributes(attrs,
            R.styleable.ScrimInsetsFrameLayout, defStyleAttr,
            R.style.Widget_Design_ScrimInsetsFrameLayout);
    /**
     * 这个就是相交区域要画的颜色
     */
    mInsetForeground = a.getDrawable(R.styleable.ScrimInsetsFrameLayout_insetForeground);
    a.recycle();
    setWillNotDraw(true); // No need to draw until the insets are adjusted

    /**
     * 监听和状态栏相交事件
     */
    ViewCompat.setOnApplyWindowInsetsListener(this,
            new android.support.v4.view.OnApplyWindowInsetsListener() {
                @Override
                public WindowInsetsCompat onApplyWindowInsets(View v,
                        WindowInsetsCompat insets) {
                    if (null == mInsets) {
                        mInsets = new Rect();
                    }
                    mInsets.set(insets.getSystemWindowInsetLeft(),
                            insets.getSystemWindowInsetTop(),
                            insets.getSystemWindowInsetRight(),
                            insets.getSystemWindowInsetBottom());
                    onInsetsChanged(mInsets);
                    setWillNotDraw(mInsets.isEmpty() || mInsetForeground == null);
                    ViewCompat.postInvalidateOnAnimation(ScrimInsetsFrameLayout.this);
                    return insets.consumeSystemWindowInsets();
                }
            });
}

@Override
public void draw(@NonNull Canvas canvas) {
    super.draw(canvas);

    int width = getWidth();
    int height = getHeight();
    /**
     * 画出相交部分的颜色
     */
    if (mInsets != null && mInsetForeground != null) {
        int sc = canvas.save();
        canvas.translate(getScrollX(), getScrollY());

        // Top
        mTempRect.set(0, 0, width, mInsets.top);
        mInsetForeground.setBounds(mTempRect);
        mInsetForeground.draw(canvas);

        // Bottom
        mTempRect.set(0, height - mInsets.bottom, width, height);
        mInsetForeground.setBounds(mTempRect);
        mInsetForeground.draw(canvas);

        // Left
        mTempRect.set(0, mInsets.top, mInsets.left, height - mInsets.bottom);
        mInsetForeground.setBounds(mTempRect);
        mInsetForeground.draw(canvas);

        // Right
        mTempRect.set(width - mInsets.right, mInsets.top, width, height - mInsets.bottom);
        mInsetForeground.setBounds(mTempRect);
        mInsetForeground.draw(canvas);

        canvas.restoreToCount(sc);
    }
}
知道了这个原理, 我们可以用这个 1
ScrimInsetsFrameLayout
1
app:insetForeground
1
ScrimInsetsFrameLayout
1
2
3
4
5
6
7
8
9
10
11
12
13
14
15
16
17
18
19
20
21
22
23
24
25
26
27
<?xml version="1.0" encoding="utf-8"?>
<android.support.v4.widget.DrawerLayout
    android:id="@+id/drawer_layout"
    xmlns:android="http://schemas.android.com/apk/res/android"
    xmlns:app="http://schemas.android.com/apk/res-auto"
    xmlns:tools="http://schemas.android.com/tools"
    android:layout_width="match_parent"
    android:layout_height="match_parent"
    android:fitsSystemWindows="true"
    tools:openDrawer="start">

    <include
        layout="@layout/app_bar_main"
        android:layout_width="match_parent"
        android:layout_height="match_parent"/>

    <android.support.design.internal.ScrimInsetsFrameLayout
        android:layout_gravity="start"
        android:layout_width="250dp"
        android:layout_height="match_parent"
        android:fitsSystemWindows="true"
        android:background="@android:color/holo_blue_bright"
        app:insetForeground="#aaff0000">

    </android.support.design.internal.ScrimInsetsFrameLayout>

</android.support.v4.widget.DrawerLayout>
最后运行的效果是这样的: